NAIA Transit Guide: Smooth Connections at Manila Airport
Everything you need to know for a hassle-free transit at NAIA
Updated July 10, 2024
Unlike most airports, the four terminals of Ninoy Aquino International Airport (NAIA) are not connected to each other by walkways. Each terminal functions like a separate airport in itself, but there are several ways to move between terminals.
The procedures in transiting/connecting at NAIA are generally the same as in other airports. However, there are some differences when your flights arrive and depart from different terminals.
Based on my experience, domestic to domestic transfers in NAIA are the easiest as you do not need to clear through customs and immigration.
Are your flights under one booking?
If you have booked your flights under one booking, the airline will usually take care of your luggage and transfer it to your connecting flight. You will also be issued boarding passes for both flights.
While it may be cheaper to book separate tickets for each leg of your journey, it is not recommended as you will be responsible for your own luggage and any missed connections. With flights under one booking, the airline will assist you in case of delays or missed connections.
Table of Contents
Philipine Airlines
Philippine Airlines provides seamless transfers for passengers transiting in Manila. If you are flying with Philippine Airlines, PAL Express, or other codeshare partners (flights operated by another airline but with a Philippine Airlines flight number), you can enjoy this seamless transfer experience.
Philippine Airlines has published their own NAIA Transfer Guide in PDF form, which I'll use as a reference for this guide.
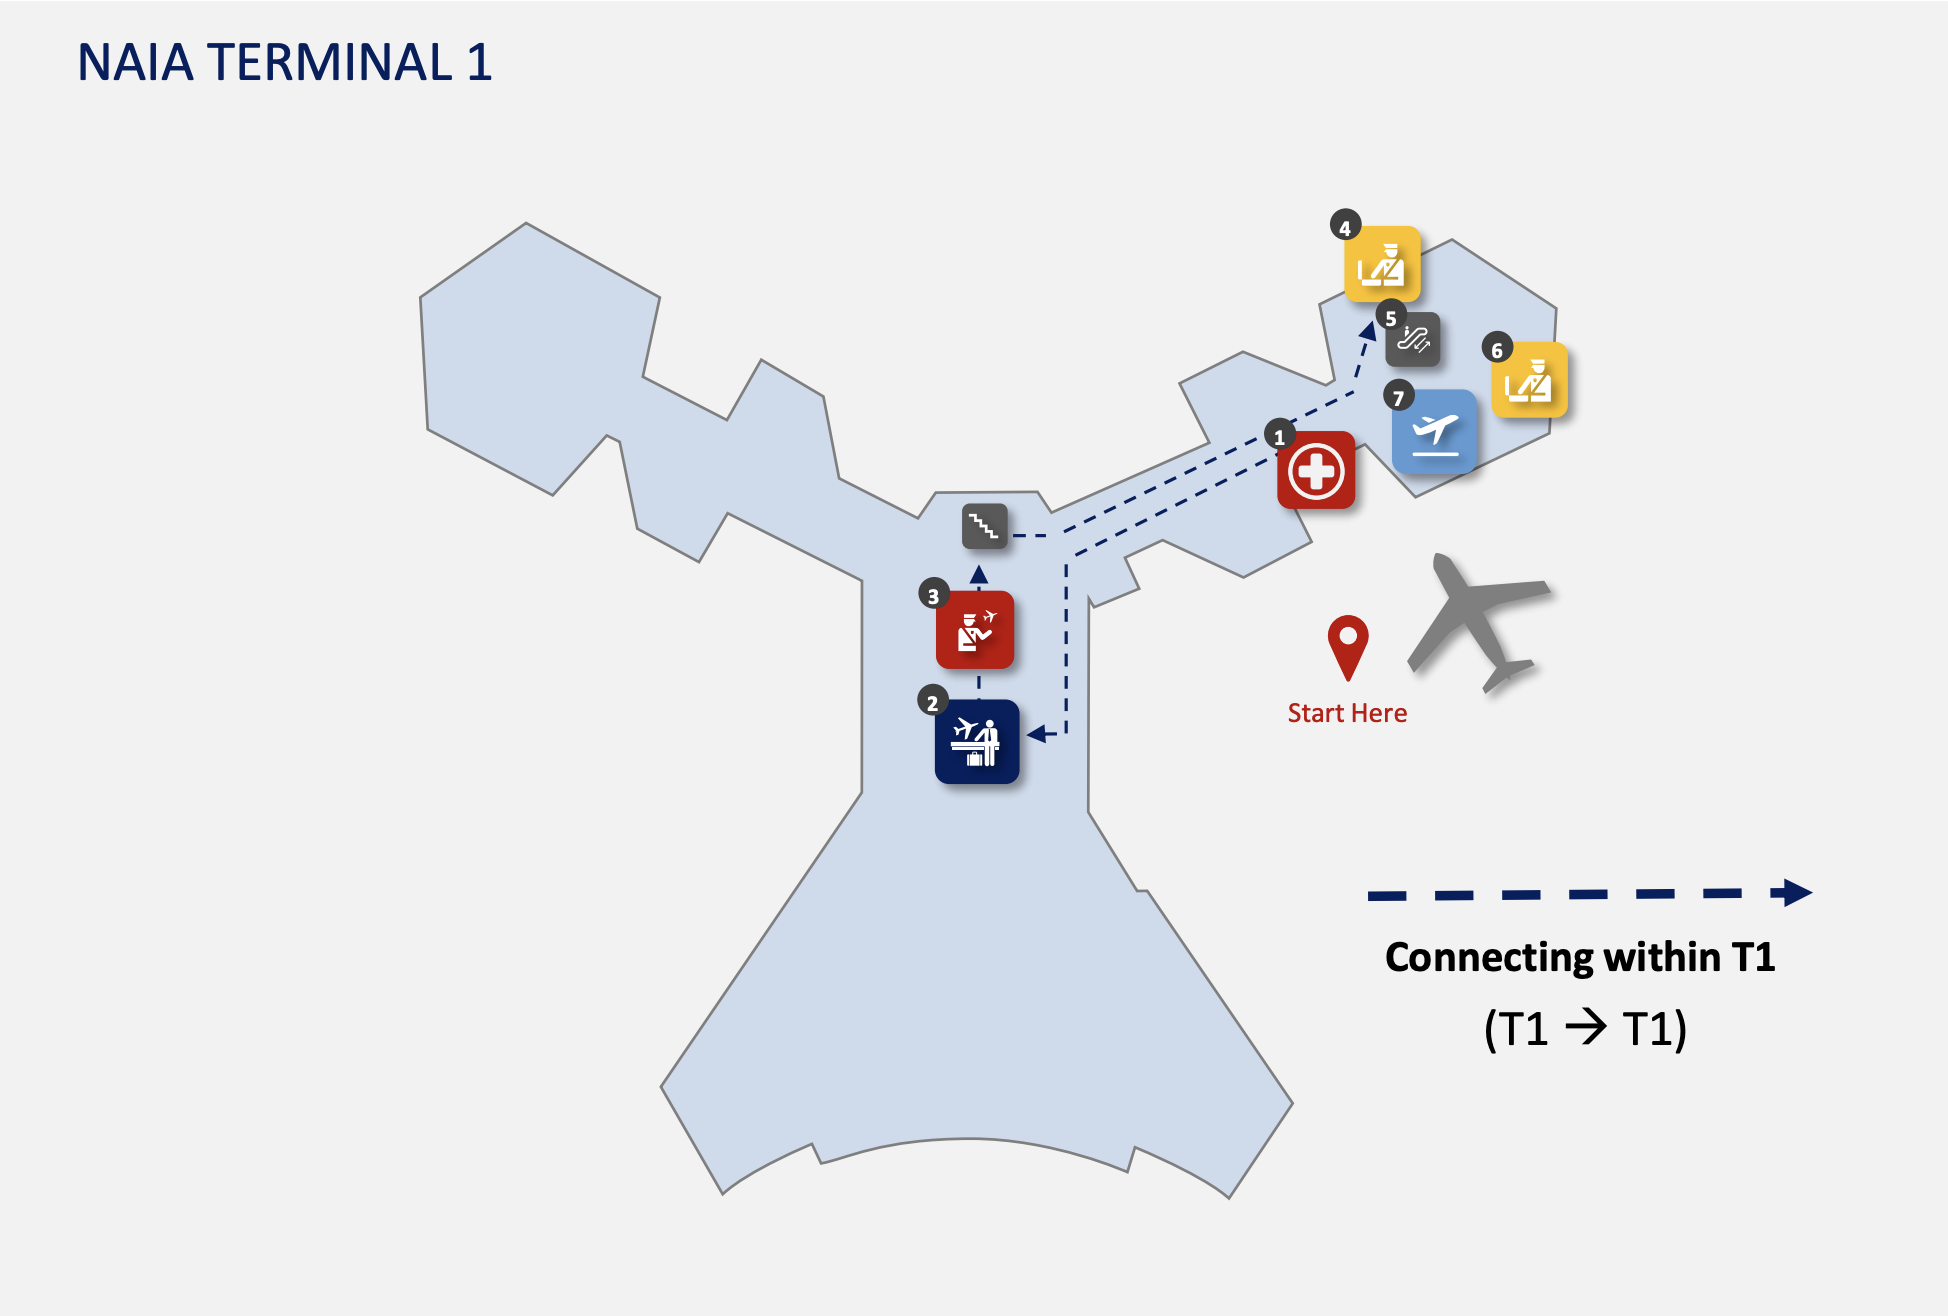
Philippine Airlines: International to International
- eTravel Verification: The official guide suggests that eTravel is needed for international to international transfers. However, you do not need to fill it out as you are not entering the Philippines.
- If you do not have a boarding pass for your onward flight, missed your connecting flight, or traveling to Australia , please proceed to the Transfer Desk located just before immigration.
- Clear security. Security check is located just before immigration.
- For passengers heading to Australia, proceed to the Baggage Screening Area.
- Take the escalator at Gate 18 to Departure Level
- For passengers heading to Australia, the United States, or Canada, , undergo Additional Passenger and Cabin Baggage Screening located just before your gate.
- Proceed to the boarding gate and await the boarding call.
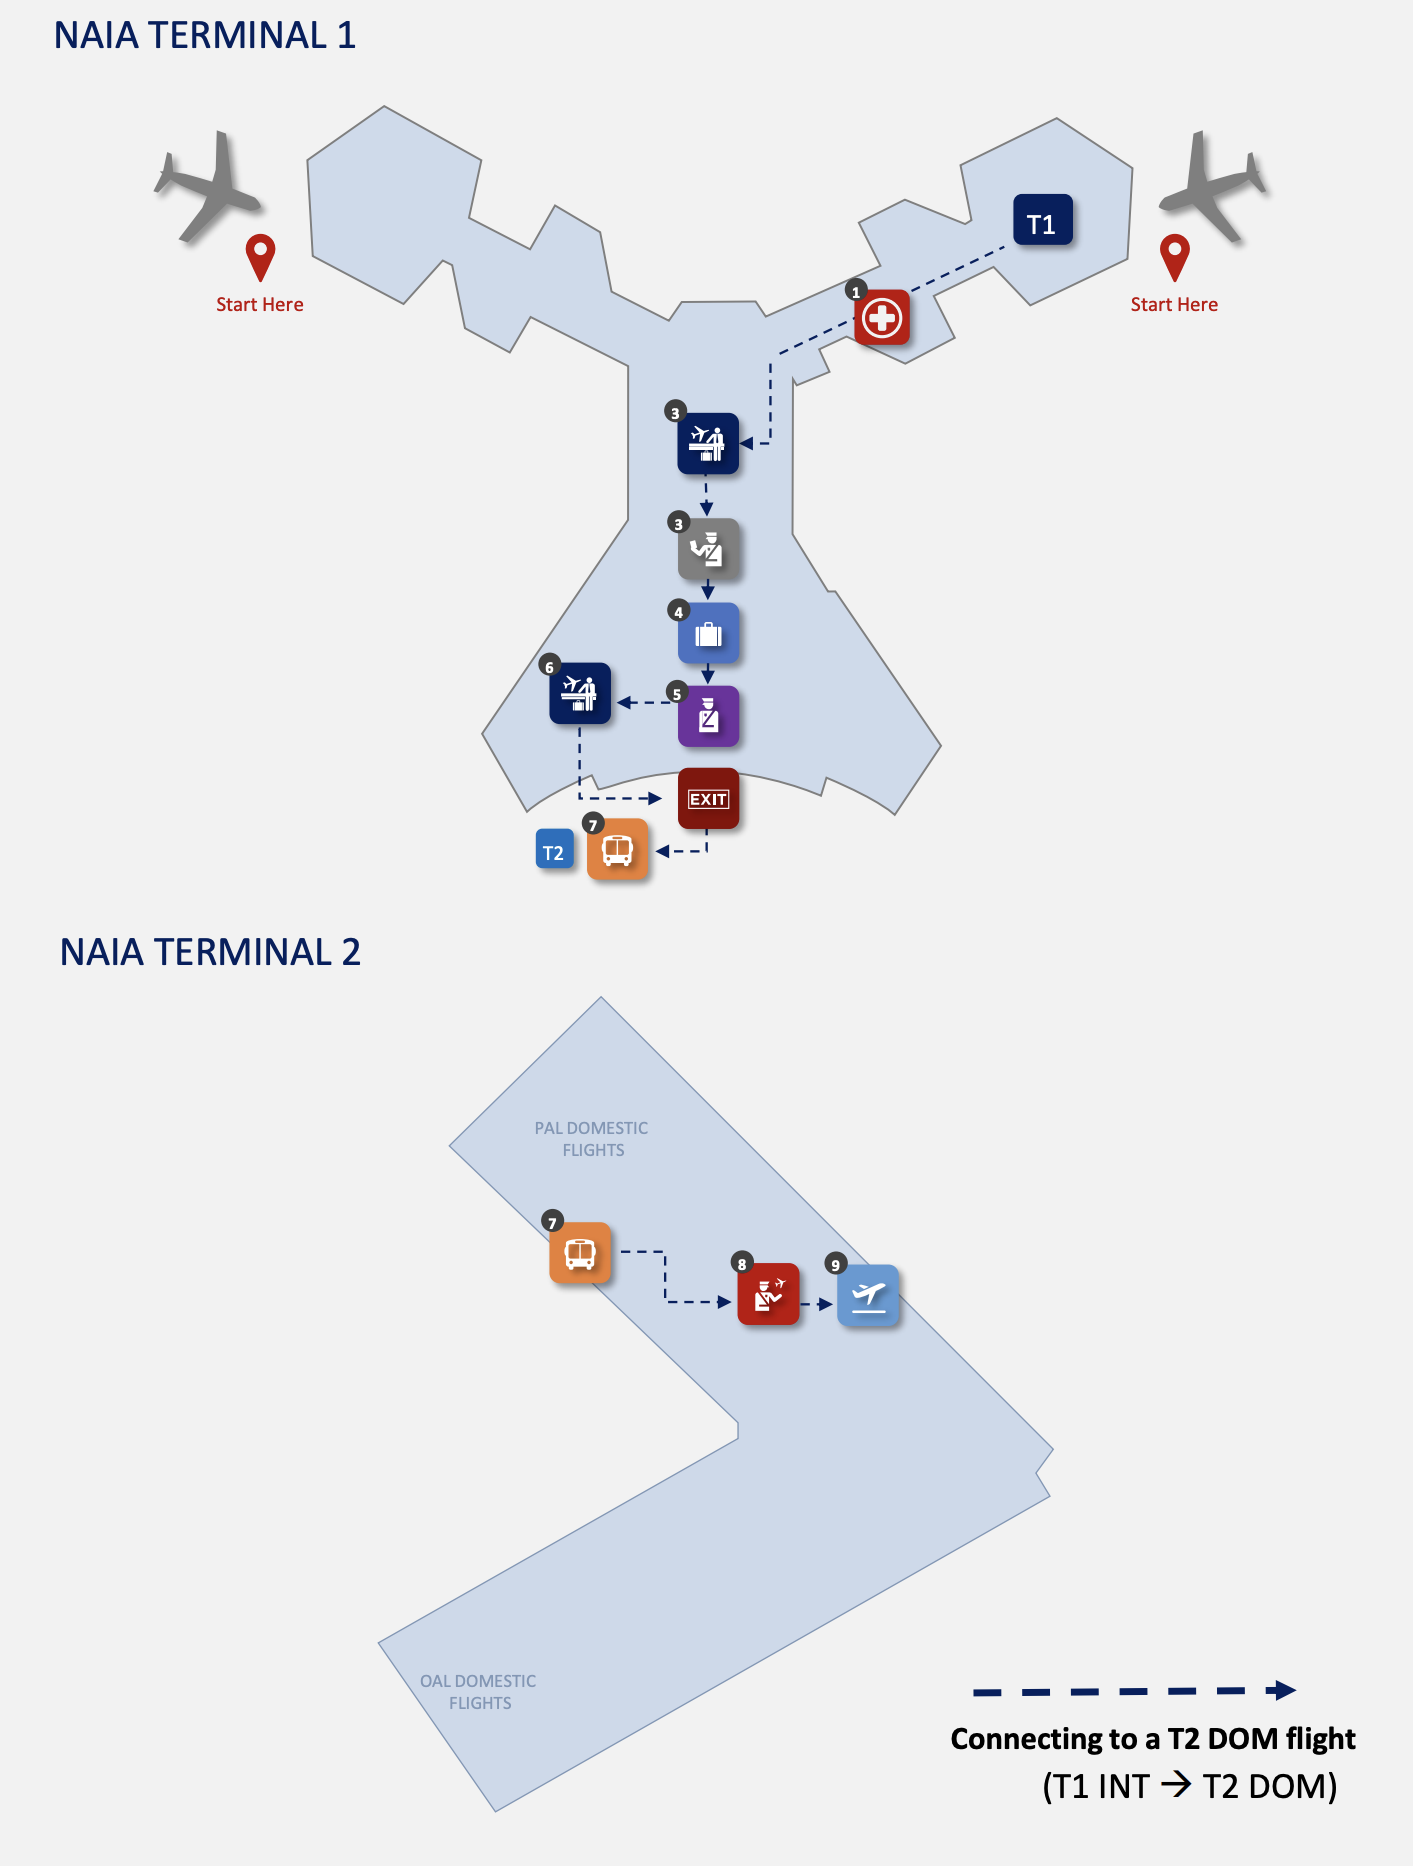
Philippine Airlines: International to Domestic
- eTravel Verification: Make sure that you have completed the eTravel form.
- If you do not have a boarding pass for your onward flight or missed your connection, proceed to the Transfer Desk located just before immigration.
- Clear Philippine Immigration. Immigration clearance is done at your first point of entry to the Philippines.
- Claim your baggage
- Proceed to Customs Clearance. Passengers with nothing to declare can proceed to the green lane.
- Proceed to Domestic Transfer Desk to drop off your checked baggage
- Ride the PAL Bus to Terminal 2. The bus waiting area is located just after clearing customs.
- Clear Security Check at NAIA 2 Departures Level entrance.
- Proceed to your boarding gate and await the boarding call.
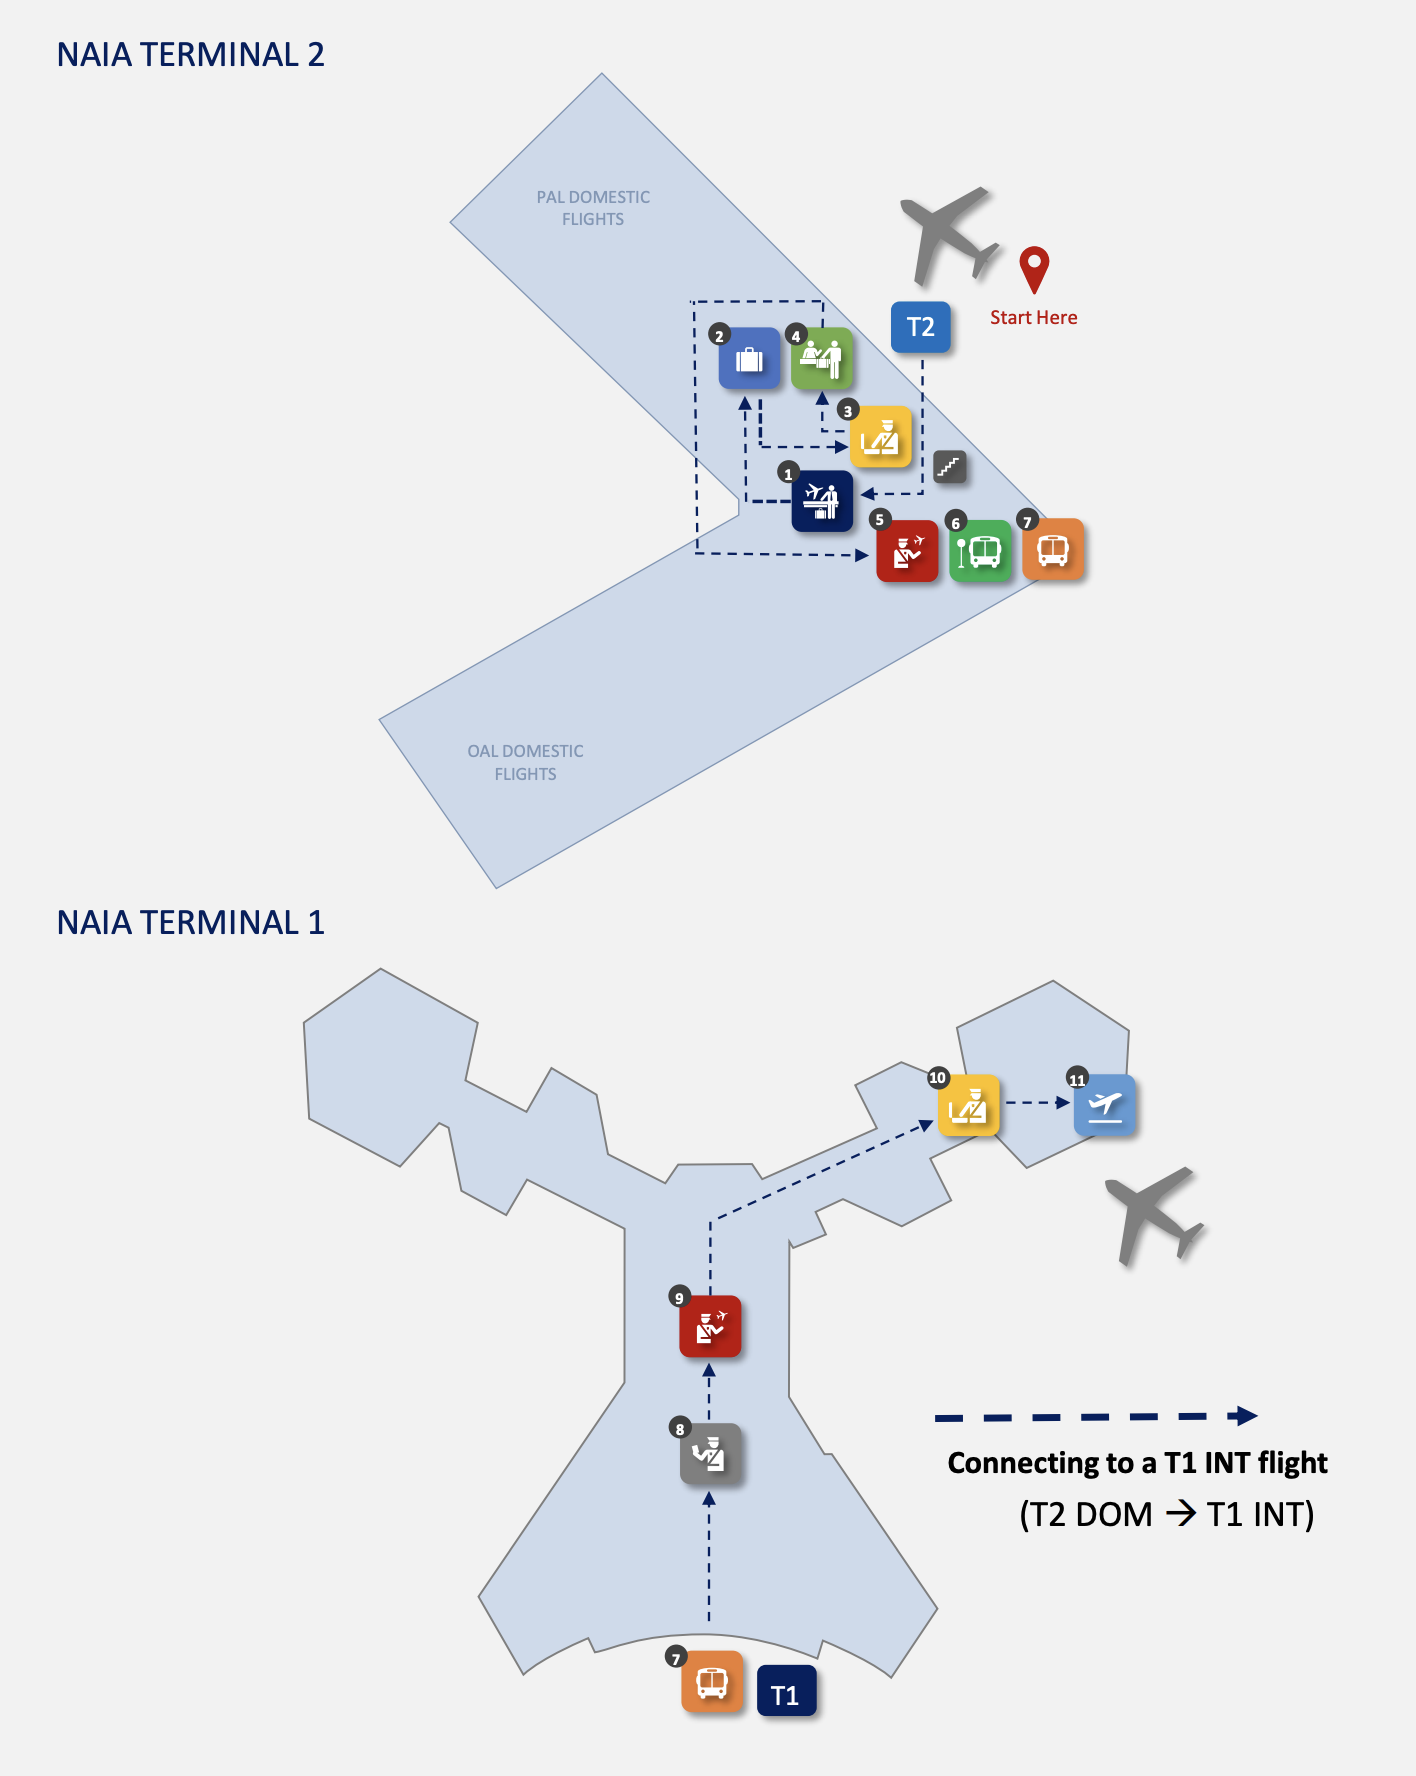
Philippine Airlines: Domestic to International
- If you do not have a boarding pass for your onward flight, missed your connecting flight, or traveling to Australia , please proceed to the Transfer Desk located just before immigration.
- If you are traveling to Australia, claim your baggage
- If you are traveling to Australia, proceed to the Baggage Screening Area
- If you are traveling to Australia, leave your checked baggage with baggage attendants next to the Baggage Screening Area.
- Proceed to X-ray area before the Transfer Holding Area
- Wait for the PAL Bus at the Transfer Holding Area
- Ride the Bus to Terminal 1
- Proceed to Immigration
- Proceed to Security
- For passengers heading to Australia, the United States, or Canada, undergo Additional Passenger and Cabin Baggage Screening right before your gate
- Proceed to your boarding gate and await the boarding call.
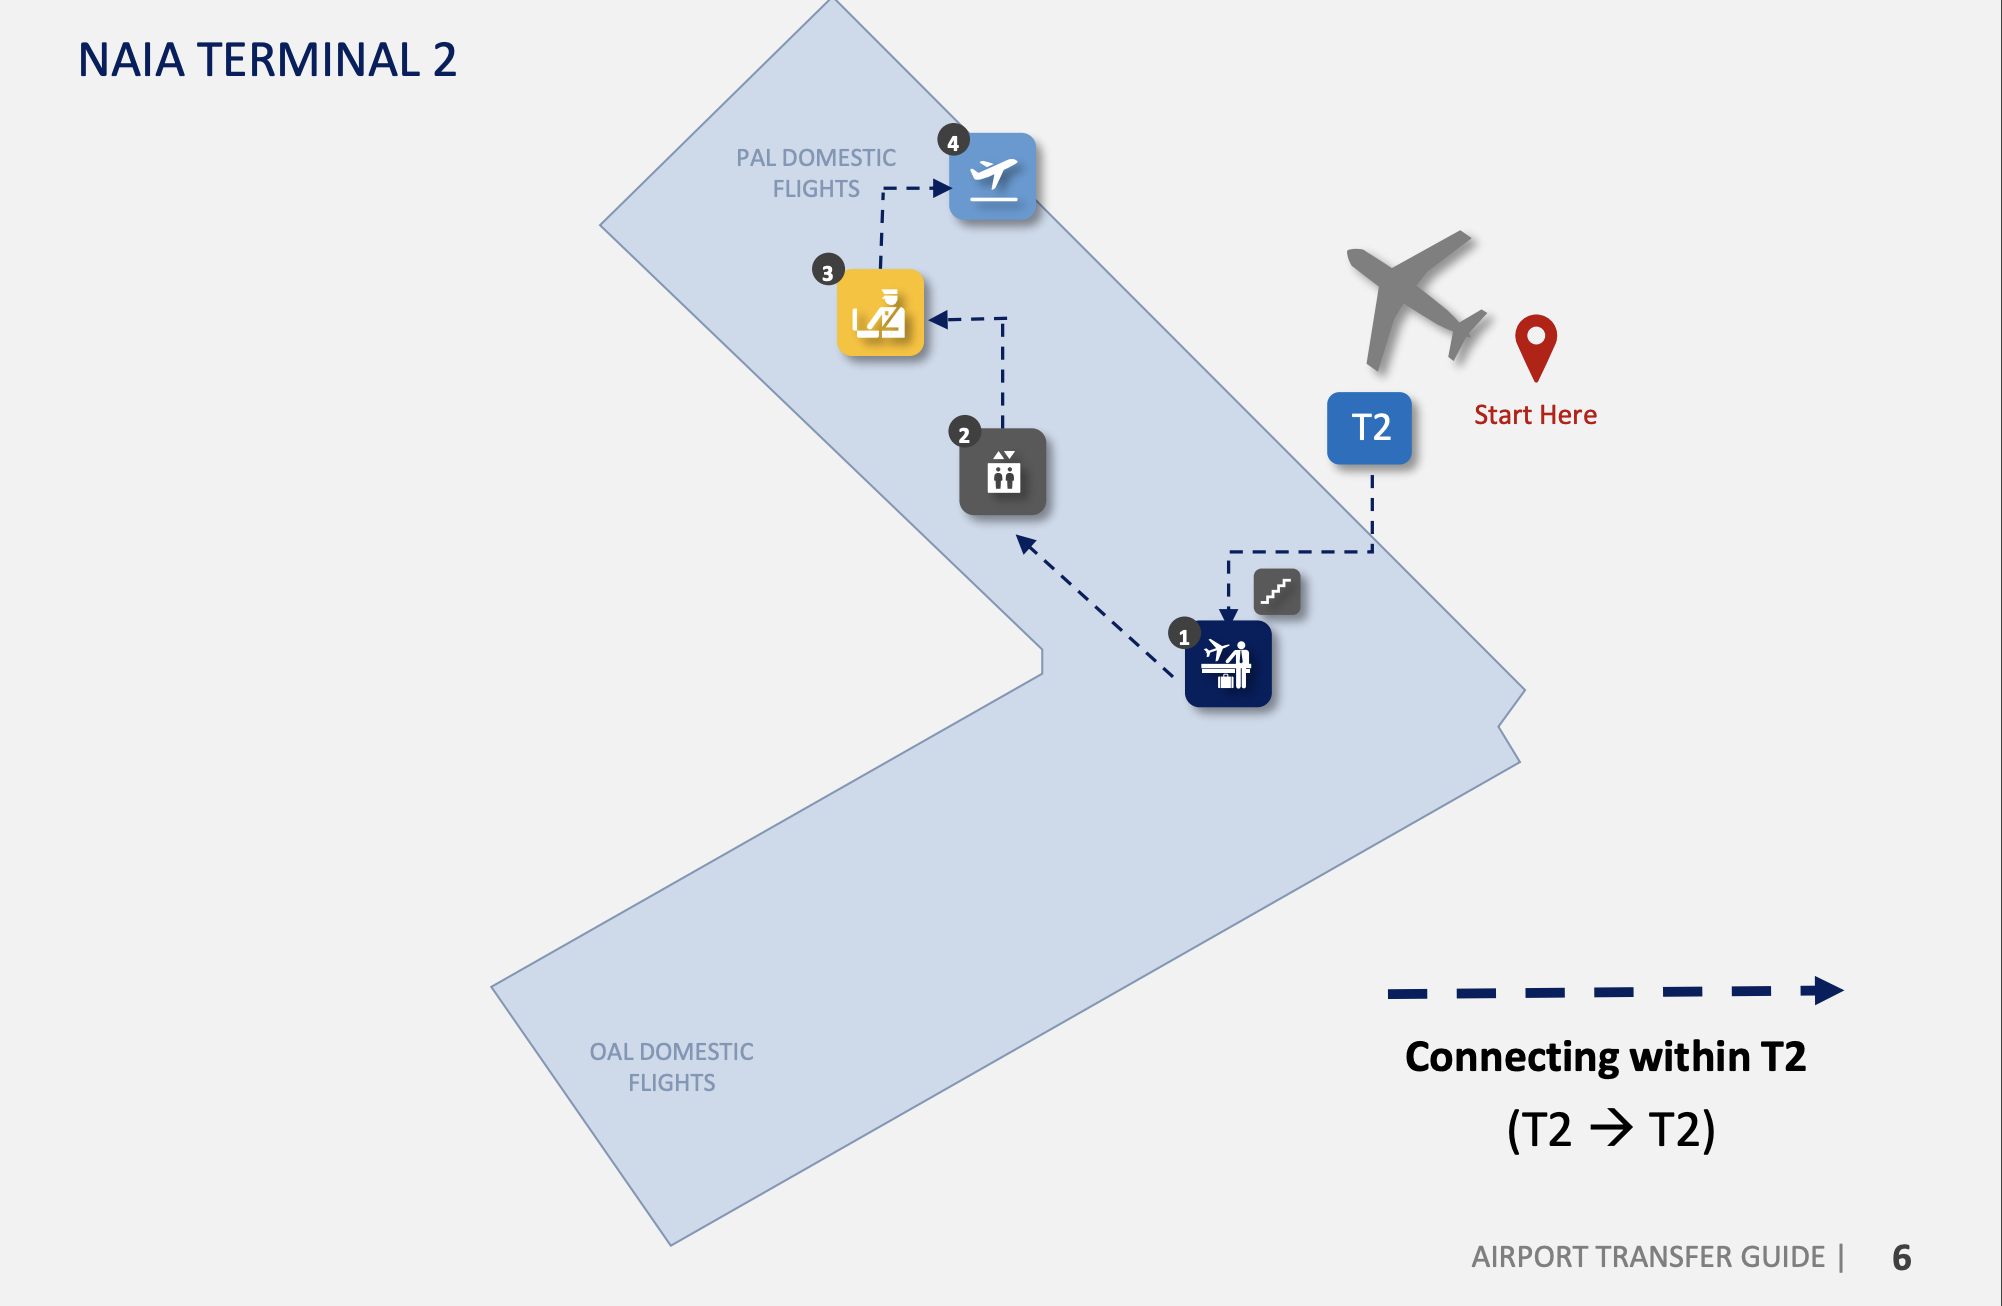
Philippine Airlines: Domestic to Domestic
- If you do not have a boarding pass for your onward flight or missed your connecting flight , proceed to the Transfer Desk
- Take the elevator or escalator to the Departure Level . You will have to exit the terminal and re-enter.
- Proceed to Security
- Proceed to your boarding gate and await the boarding call.
Cebu Pacific
Cebu Pacific: International to International
If you’re flying with Cebu Pacific and have an international to international connection in Manila, you'll need to enter the Philippines. This means clearing immigration, collecting your checked baggage, and passing through customs. Ensure you have a valid visa if needed.
Once done, you'll need to check in again if you don't have a boarding pass for your next flight and drop off your checked luggage. Then, exit the Philippines by clearing immigration, go through security, and head to your boarding gate.
This process isn't ideal for Filipinos, as they may have to pay the Philippine Travel Tax.
Cebu Pacific: Domestic to International
If you are flying from a domestic destination to an international destination with Cebu Pacific, you can have your baggage checked through to your final destination. This means you do not have to claim your baggage in Manila.
Your immigration clearance will occur in Manila though as this is your port of exit from the Philippines.
If you are flying from a CebGo flight that arrives in Terminal 4, you will need to transfer to Terminal 3 for your international flight. The airport provides a free shuttle bus service between terminals.
Cebu Pacific: International to Domestic
If you are flying from an international destination to a domestic destination with Cebu Pacific, you will need to clear immigration, collect your checked baggage and clear customs in Manila. You have to drop your baggage again at the check-in counters before proceeding to your domestic flight.
If you do not have any checked baggage, you can just clear immigration and proceed to your domestic flight.
If your onward flight is a CebGo flight, you will need to transfer to Terminal 4 from Terminal 3. The airport provides a free shuttle bus service between terminals.
Cebu Pacific: Domestic to Domestic
Ah, the easiest transfer of them all. If you are flying from a domestic destination to another domestic destination with Cebu Pacific, your baggage will be checked through to your final destination. Upon arrival, just find the transfer desk for your next flight or just exit the baggage claim area and proceed to the Departures Level.
If your onward flight is in a different terminal, you will have to transfer between terminals. The airport provides a free shuttle bus service between terminals.
Other Airlines
Other Airlines: International to International under one booking and same terminal
If you are flying with other airlines and have an international connection in Manila under one booking (same airline, codeshared flight or partner airlines), the process is much simpler as long as they're located at the same terminal.
Upon arrival in Manila, proceed to the Transfer Desks right before immigration. Airline staff will assist you in entering the Departures Level so you can proceed to your next flight.
Other Airlines: International to International under one booking and different terminals
This process is much more complicated. Even though your baggage will be checked through to your final destination, you will still need to undergo immigration clearance in Manila. The airline might provide you with a shuttle bus to transfer between terminals. If not, the airport authority provides a free shuttle bus service between terminals. Upon arrival at the next terminal, you can proceed to the Departures Level and clear immigration and security. After which, you can proceed to your boarding gate.
Other Airlines: International to International under separate bookings
If you have an international to international connection in Manila under separate ticket/booking, you'll need to enter the Philippines. This means clearing immigration, collecting your checked baggage, and passing through customs. Ensure you have a valid visa if needed.
If your onward flight is in a different terminal, you will have to transfer between terminals. The airport provides a free shuttle bus service between terminals.
Once done, you'll need to check in again if you don't have a boarding pass for your next flight and drop off your checked luggage. Then, exit the Philippines by clearing immigration, go through security, and head to your boarding gate.
This process isn't ideal for Filipinos, as they may have to pay the Philippine Travel Tax.
Other Airlines: Domestic to Domestic
If you are flying from a domestic destination to another domestic destination with another airline, you will only have to collect your bags if your flights are under separate bookings. If not, your baggage will be checked through to your final destination.
If your onward flight is in a different terminal, you will have to transfer between terminals. The airport provides a free shuttle bus service between terminals.